TABLE OF CONTENTS
Description
ThingsBoard is an open-source Internet of Things (IoT) platform designed to manage devices, collect and visualize telemetry data, and enable automation.Users can create customizable dashboards to monitor real-time data, analyze historical trends, and set up rule-based alerts or automated actions. ThingsBoard also provides scalable solutions suitable for both small deployments and enterprise-level applications. With support for device provisioning, multi-tenant management, and extensible APIs, it enables developers and businesses to build complex IoT systems efficiently while maintaining flexibility and security.
Next, this article will explain how to use a gateway to push sensor data to ThingsBoard via the HTTP Integration method. In this demonstration, the gateway used is the UG65, and the sensor is the AM308, serving as an example for a complete end-to-end workflow.
Note 1: The AM08 device mentioned here is only for demonstration purposes and does not imply that other types of sensors are not supported. Readers should refer to the steps according to their actual situations.
Note 2: This method is only supported for UG65, UG56, and UG67 models.
Requirement
Gateway Model: UG65 (UG67 also supported)
Firmware Version: v60.0.0.47 or later
Gateway Model: UG56
Firmware Version: v56.0.0.7 or later
Sensor Model: AM308, EM300-SLD
Frequency Band: US915 (used in this demonstration)
Gateway must already be connected to the Internet
A valid ThingsBoard Platform account is also required
Configuration
Step 1: Register an Account of ThingBoard Platform
Visit https://thingsboard.cloud/signup and follow the on-screen instructions to create a temporary account (free 30-day trial).

The interface displayed upon first login after registration is as follows:

Step 2: Create the HTTP Integration configuration
A single ThingsBoard Integration may work with multiple devices/device types at once.
If you have multiple device types, you may use separate Integrations for each device type for easier setup. It will also allow easier debugging and checking the Integration status for each device type.
This approach is used in our example.
In this demonstration, there are two device types: AM308 and EM300-SLD, so we will create two HTTP integration configurations accordingly.
Following the steps in the screenshot, click Integrations under Integrations center, then click the "+" button in the upper-right corner.

Click the HTTP tab :

Change the Name to HTTP Integration for AM308 Series, then check whether Allow Create Devices and Assets is enabled (it is enabled by default), and click the Next button :

In the interface, click the Library tab, enter Milesight for Vendor, and AM308 for Mode.
Then select the first option and click Next.
Note: The Decoder field will automatically match the corresponding device decoder code, leave it as the default.

Click the Skip button to proceed :

Click the Copy button next to the address bar. The address will be automatically copied to your clipboard.
Finally, click the Add button to complete the addition :

Similarly, we create the configuration for EM300-SLD.
The final result after creating all configurations is as follows:

At this point, our HTTP integration configurations have been created.
Step 3: Configure the gateway
a) Enable the Embedded NS feature
First, log in to your gateway management interface (refer to <How to Login Web GUI of Milesight Gateway>).
Then operate as shown in the screenshots:
(If it is already enabled, you can skip this step.)


If the status shows Embedded NS is Enabled and Connected, it means the Embedded NS is successfully enabled.

b) Create the Application configuration
Since there are two types of devices in this demonstration, we need to create two applications, one for AM308 and one for EM300-SLD.
The operation steps are as follows:
(These steps mainly follow “How to Connect Milesight LoRaWAN Gateway to HTTP(s) Server?” , below are key screenshots from my configuration process for your reference. )
Configure it as shown in the figure, and be sure to check the Metadata and Details options :
Here, select Type: HTTP, and enter the Uplink Data field with the address we obtained earlier from ThingsBoard :

Similarly, create an application configuration for EM300-SLD.
The final result after creating all configurations is as follows:

c) Add the devices to the gateway
Here, the configuration mainly follows “How to Connect LoRaWAN Nodes to Milesight Gateway”.
Below are key screenshots from the configuration process for your reference.
When adding the devices, select the Application corresponding to the sensor type from the dropdown, and set Payload Codec to None :

Similarly, add the remaining sensors in the same way. The final result after adding all devices is as follows:

At this point, our configuration is complete.
Next, go to ThingsBoard to check whether the devices have been automatically created and if the data is being received in real time.
Step 4: Check the result
Return to the ThingsBoard platform and navigate to the Devices page.
We can see the following results:


The platform has automatically created the corresponding device configurations, and the real-time data reported by the devices is visible.
At this point, our entire guide is complete. Next, we will create a simple Dashboard to display the data.
Step 5: Create a dashboard example
Click Add in dashboard page

input the name and upload the dashboard image if needed.

choose the preferred widgets bundle
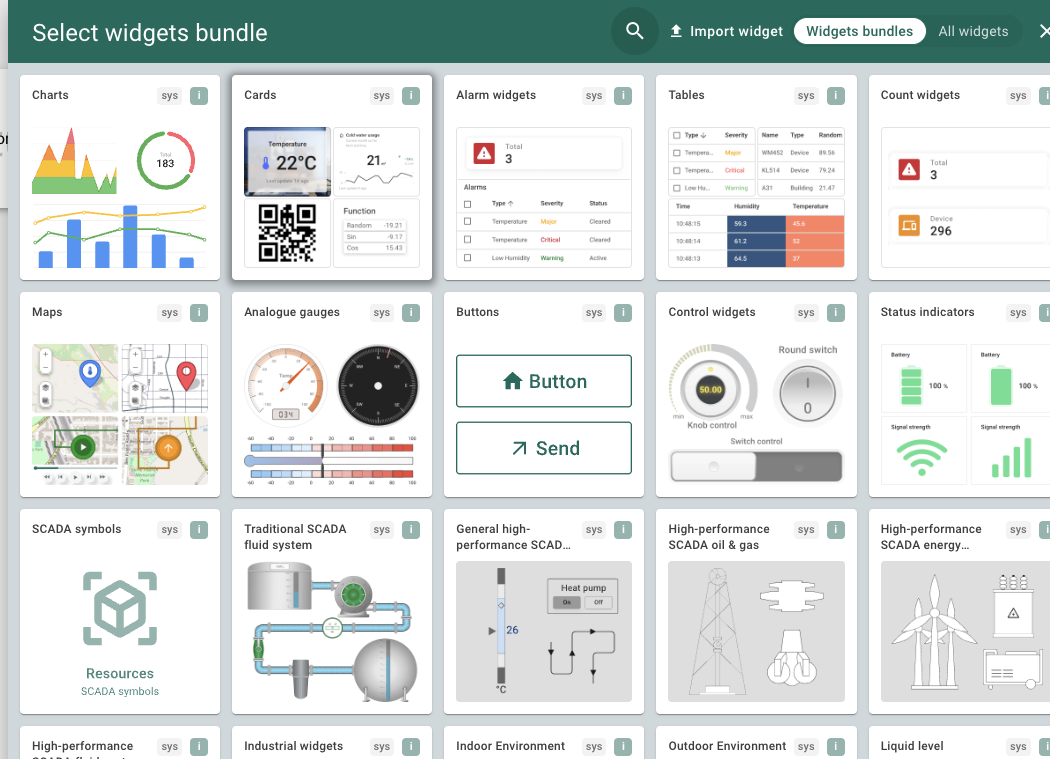
select the exact wiget type you prefer

then choose the data source, which is the sensor devices.

when done, the data will show correctly.

--END--
Was this article helpful?
That’s Great!
Thank you for your feedback
Sorry! We couldn't be helpful
Thank you for your feedback
Feedback sent
We appreciate your effort and will try to fix the article