1-General Method Integration
TABLE OF CONTENTS
1-General Method Integration
Description
Zoho IoT is an IoT solution launched by Zoho, aimed at helping enterprises manage and monitor IoT devices, enabling data collection, remote control, and automated operation and maintenance. The platform supports multiple protocols, offers visual dashboards, a rules engine, and API interfaces. It is applicable to scenarios such as smart industry, intelligent buildings, and remote asset management. As a globally recognized software company, Zoho’s IoT solution integrates seamlessly with its ecosystem, helping businesses improve operational efficiency and data-driven decision-making.
This document mainly explains how to use a UG65 gateway to connect to the Zoho IoT platform , and demonstrates the complete process of adding AM308 devices to Zoho IoT as examples.
Requirement
- Gateway Model: UG65 (UG56, UG67 also supported)
Sensor Model: AM308
Frequency Band: US915 (used in this demonstration)
The gateway must be connected to the internet
Configuration
Step 1: Register a Zoho IoT Account
Visit https://www.zoho.com/iot/ and click SIGN IN in the top right corner:
On the redirected page, fill in your basic information as required:
Step 2: First Login
After logging in for the first time, the platform will guide you to create your first Portal.
Use “Milesight” as an example name, or choose any name based on your situation: Next, you'll be prompted to create your first Application.
Here, we use “Milesight Demo” as an example:
Since we're using a Free account, there's a 30-day free trial. You can modify or extend the trial later based on your needs:


At this point, your first Application is created. All subsequent configurations will be done within this application.
Step 3: Create Data Streams
Follow the operation steps shown in the figure:


Configure the data stream according to the following information:

Note: For demonstration purposes, security authentication is disabled here. Please configure the settings based on your actual requirements.
After adding, the result should look like this:

Click on the created data stream.
Follow the screenshot below to obtain the MQTT connection information from the platform:


Record this information as it will be needed later when configuring the gateway.
Step 4: Configure the Gateway
a) Enable Built-in Network Server
Log into the gateway’s web interface. Follow the steps shown in the screenshot (skip this step if it's already enabled):

b) Add AM308 Device
Refer to the guide <How to Connect LoRaWAN Nodes to Milesight Gateway> for this step. Once added, the result should look like this:

c) Configure Decode Code
Refer to <How to Use Payload Codec on Milesight Gateway>. In addition to the original decode code, replace the following content:
var merged = {};
merged.applicationID   = LoRaObject.applicationID;
merged.applicationName = LoRaObject.applicationName;
merged.deviceName      = LoRaObject.deviceName;
merged.devEUI          = LoRaObject.devEUI;
merged.time            = LoRaObject.time;
merged.rxInfo          = LoRaObject.rxInfo;
merged.txInfo          = LoRaObject.txInfo;
merged.fCnt            = LoRaObject.fCnt;
merged.fPort           = LoRaObject.fPort;
merged.data            = LoRaObject.data;
merged.object = decoded;
merged.object.applicationID = LoRaObject.applicationID;
merged.object.devEUI = LoRaObject.devEUI;
return merged;
After editing, the result should look like this:


Then, go back and update the previously added AM308 device to associate it with the modified decode configuration:

d) Configure MQTT Parameters
Refer to <How to Connect LoRaWAN Gateway to MQTT Broker> for this step. Once completed, your settings should resemble the screenshot below:
Note: All parameters here are obtained from Step 3.
Save and wait a few seconds. If it shows a green “Connected” status, it means the configuration was successful.
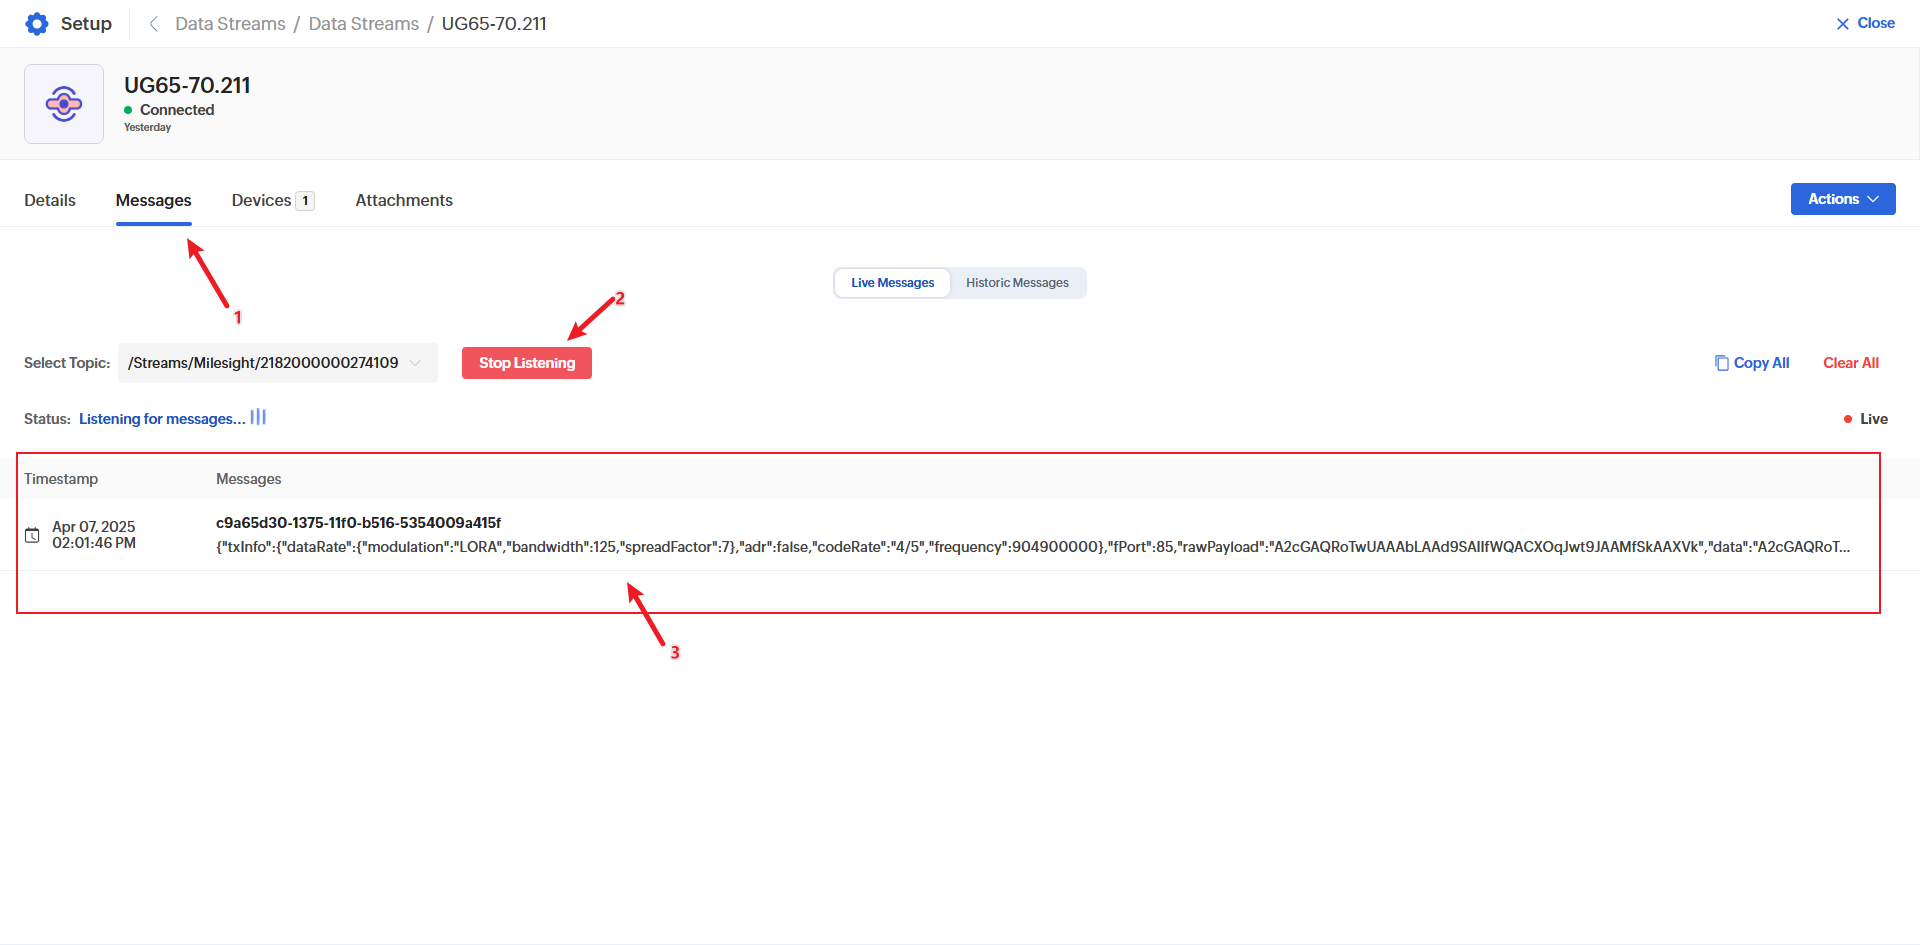
At the same time, go back to the Data Streams page on Zoho and follow the screenshot below. If you can see incoming data, it means the data link between the gateway and platform has been successfully established.
The gateway configuration is now complete.
Step 5: Add Device to Zoho
Follow the steps shown below to add a new device:


Once added, it should look like this:

Click into the device and proceed with further configuration, following the steps below:


At this point, the AM308 device has been successfully added to the Zoho IoT platform and is displaying real-time data.
Back in the default Dashboard view, you should see data similar to the figure below:

This concludes the entire integration process.
-END-
Was this article helpful?
That’s Great!
Thank you for your feedback
Sorry! We couldn't be helpful
Thank you for your feedback
Feedback sent
We appreciate your effort and will try to fix the article