Index:
1-Vemco Platform - VS133 LoRaWAN Integration
2-Vemco Platform - VS133-P Integration
3-Vemco Platform-Milesight AI Stereo People counter(VS12X) integration
TABLE OF CONTENTS
Full Integration Video Guide:
1-Vemco Platform - VS133-LoRaWAN Integration
Description
Vemco Group is a leading data analytics software company specializing in cutting-edge solutions for people counting, retail analytics, IoT dashboards, and business optimization. Our global partner network spans various sectors, including retail, entertainment, smart buildings, and public institutions. Together, we help businesses gain deep insights into visitor behavior and enhance operational efficiency using data from various sensors.
This document outlines the integration processes for both the VS133 LoRaWAN version and PoE version.
1. Hardware Requirements
● Gateway Model: UG65 or UG56, UG67, UG63, SG50
● Sensor Model: VS133-915M LoRaWAN
● Frequency Band Used in This Example: 915M (8-15 channels)
2. Network Requirements
● Ensure that the gateway is connected to the internet and can access the Vemco server.
3. Adding UG65 Gateway to Vemco Platform
3.1. Gateway Configuration
First, disable the built-in LNS. Log in to the UG65 gateway management interface and navigate to Packet Forward -> General, then configure as shown below:


Next, configure the Semtech parameters as shown:

After completing all configurations, the result should be as follows:
Important Notes:
● The server address should be ttn.vemcount.app, with uplink and downlink ports set to 1700.
● After completing the setup, wait a moment. If the status shows Connected, the addition was successful. Otherwise, refer to <Fail to Access the Network of Milesight Gateway> for troubleshooting.
3.2. Adding the Gateway to Vemco Platform
Log in to https://vemcount.app/ , click the top-right menu, and navigate to Services.

Click Devices to enter a new interface.

Hover over the Gateways section and click New Gateway.

Configure the gateway as shown : 
Notes:
1. The EUI parameter is retrieved from the gateway.
2. Since both the gateway and VS device use the 915MHz frequency band, select the frequency plan accordingly.
Once added, the result should be as follows
4. Configuring the VS133 Device
Refer to the <VS133 User Guide> to access the device management interface. Navigate to Communication -> Device LoRa Info, as shown:

Record the DevEUI, App EUI, and Application Key, as they will be used later.
Important Notes:
1. Join Type must be set to OTAA (ABP is not supported).
2. The Application Key is hidden by default; click the icon to reveal it.
3. Since we are using US915, the Region must be set to US915.
4. Other parameters should remain as default.
5. Creating Vemco Hierarchical Structure
According to the Vemco system design, users need to create a Company and Location hierarchy. In this guide, we use:
● Company: Milesight
● Location: Demo Test
● Installation Zone: Test Zone
The hierarchical structure is shown below:
Now that we have created the basic structure, we can proceed with adding the sensor.
6. Adding VS133 to the Platform
Click Add Sensor and fill in the details as shown:

A pop-up window will appear:

Parameter Explanation:
● Name: Enter as per your requirement.
● Subscription: Select from the dropdown.
● Type: Select People Counter.
● DevEUI: Enter the DevEUI obtained in Step 1.4.
● Vendor: Select milesight IoT.
● Frequency Plan: Select United States 902-928 MHz, FSB2 (used by TTN).
● LoRaWAN MAC Version: MAC V1.0.3.
● LoRaWAN PHY Version: PHY_V1.0.3_REV_A.
● Join EUI: Enter the App EUI from Step 1.4.
● App Key: Enter the Application Key from Step 1.4.
Click Submit to complete the process.
Important Notes:
● Vemco determines sensor uniqueness based on DevEUI. If you receive a duplicate DevEUI error, the device has already been added.
7. Observing Data
After completing the steps above, wait a moment, and you will see VS133's reported data in the Test Zone interface:
Note:
The red color indicates no recent data updates. You can reduce the reporting interval of VS133 to resolve this.
At this point, VS133 has been successfully added to the Vemco platform, and the data link is operational.
2-Vemco Platform - VS133-P Inte
Since the Vemco platform offers an HTTP API, VS133-P mainly uses this API for data reporting.
1. Hardware Requirements
● Sensor Model: VS133-P version, Firmware v133.1.0.8
2. Network Requirements
● Ensure the VS133-P device is connected to the internet and can access the Vemco server.
3. Platform API URL
● Vemco’s default HTTP API URL: https://data.vemcount.com/ss/milesight
4. Configuring VS133-P
Refer to the VS133-P User Guide User Guide and navigate to Communicate -> Data Push Settings:
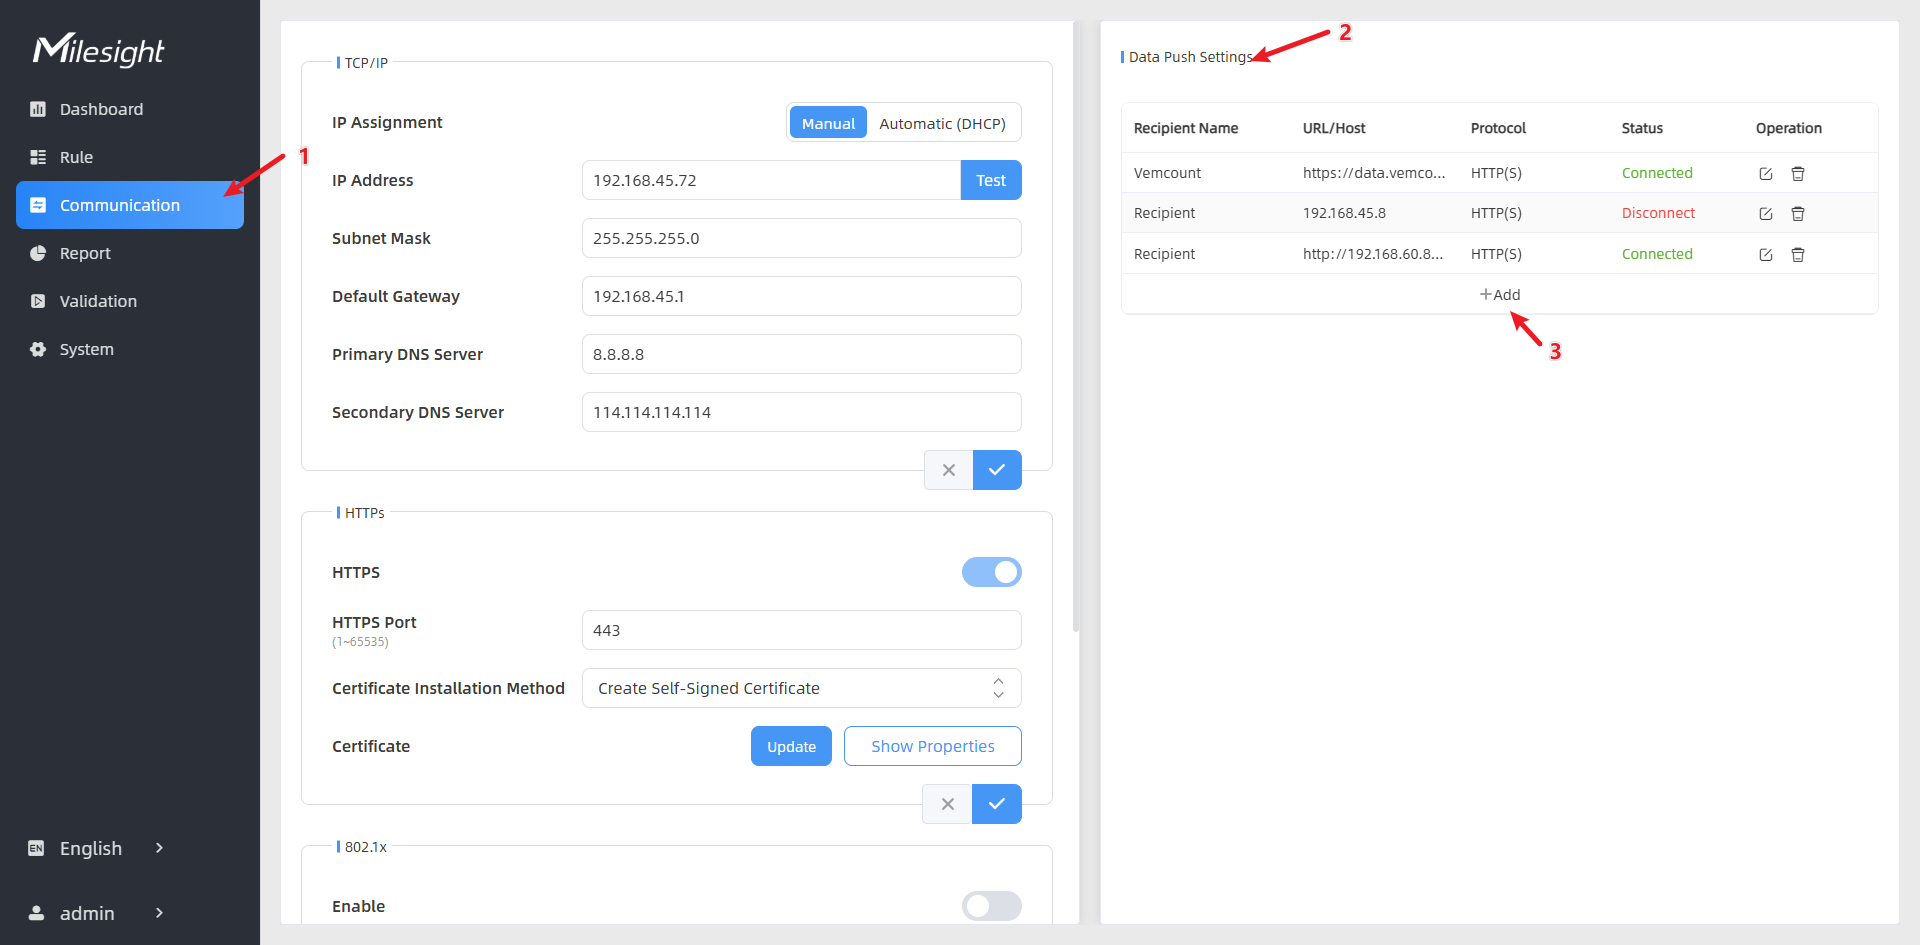
Click +Add and configure as follows:


Parameter description:
● Recipient Name : Fill in the name according to your actual needs.
● Report Protocol : Select HTTP(S) from the drop-down list.
● URL : fill in https://data.vemcount.com/ss/milesight
● Username : Leave blank
● Password : Leave it blank
● Trigger Report : Slide on
● Periodic Report : Slide to on.
● Periodic Report Scheme: Select “From Now On”.
● Period: Fill in 1 minute here.
Keep the rest of the parameters as default.
After adding, refresh the interface, we will see that the Status shows green Connected, which means that VS133-P is connected to Vemco's platform network normally.

5. Retrieving VS133-P MAC Address
Navigate to System -> Device Info and copy the MAC Address:

Special Note:
According to Vemco's Sensor management logic, the platform determines the uniqueness of a device based on the MAC information of the VS133-P, and readers need to pay special attention not to add devices with duplicate MACs, or they will fail to be added.
6. Creating Vemco Hierarchical Structure
According to the Vemco system design, users need to create a Company and Location hierarchy. In this guide, we use:
● Company: Milesight
● Location: Demo Test
● Installation Zone: Test Zone
The hierarchical structure is shown below:
Now that we have created the basic structure, we can proceed with adding the sensor.
7. Adding VS133-P to the Platform
Click Add Sensor and fill in the details as shown:
A pop-up window will appear:


Parameter Descriptions:
● Name: Enter as per your actual requirements.
● Subscription: Select the appropriate option from the dropdown.
● Type: VS133-P is a People Counter device.
● MAC: Enter the MAC address obtained in Step 2.5.
● Vendor: Select milesight.
● Other parameters: Leave blank.
After completing the setup, click the "Submit" button.
8. Monitor the Data
After completing the previous steps, wait for a moment, and you will see data from the VS133-P device displayed in the Test Zone interface, as shown below:

At this point, the VS133-P device has been successfully added to the Vemco platform, and the data transmission is functioning properly.
-END-
Was this article helpful?
That’s Great!
Thank you for your feedback
Sorry! We couldn't be helpful
Thank you for your feedback
Feedback sent
We appreciate your effort and will try to fix the article