Description
Milesight AM100 Series Sensor supports 3 types of display modes as below.
| AM104 | ||
| Mode 1 | Mode 2 | Mode 3 |
 |  |  |
| AM107 | ||
| Mode 1 | Mode 2 | Mode 3 |
 |  |  |
Milesight AM300 Series Sensor supports 3 types of display modes as below.
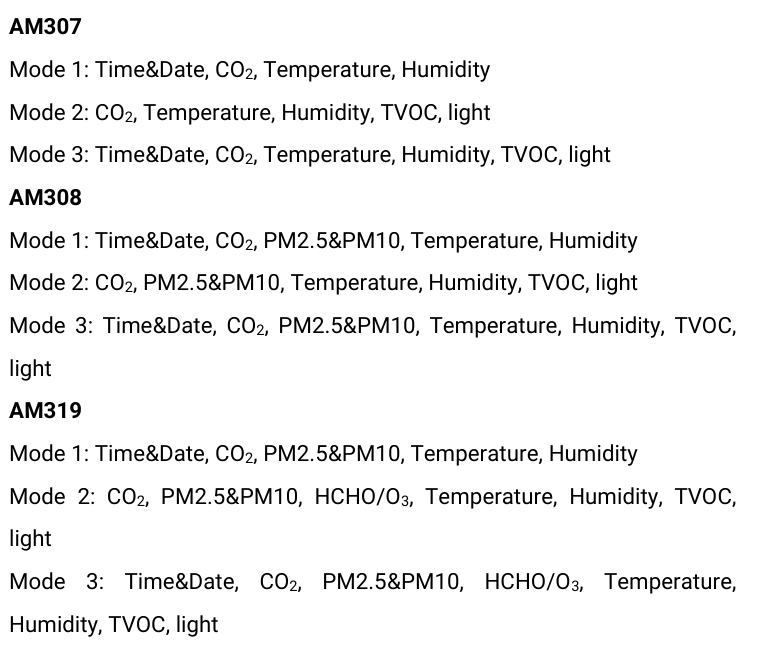
This article will guide you how to switch display mode on the screen.
Requirement
Milesight LoRaWAN Sensor: AM104/AM107/AM307/AM308/AM319
Configuration
For AM104/AM107:
Here are 3 methods to switch among the three modes:
- Power button: Quick press the power button to switch the mode.

- Toolbox App: Go to Milesight ToolBox App menu Device -> Setting -> General Settingsto select screen display mode, and then click Write to set.

- Software: Go to Toolbox menu Device Settings -> Basic -> Basic Settingsto select screen display mode, and click Save.
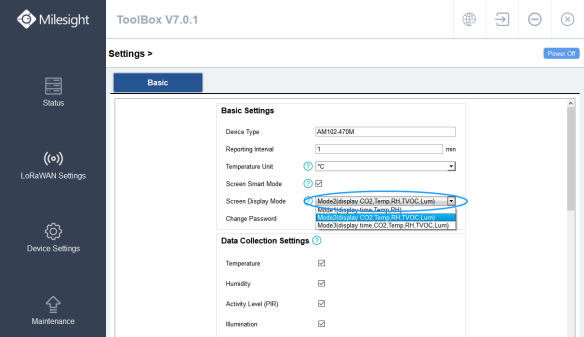
For AM300 Series:
Here are 3 methods to switch among the three modes:
- Toolbox App: Go to Milesight ToolBox App menu Device -> Setting -> General Settings to select screen display mode, and then click Write to set.
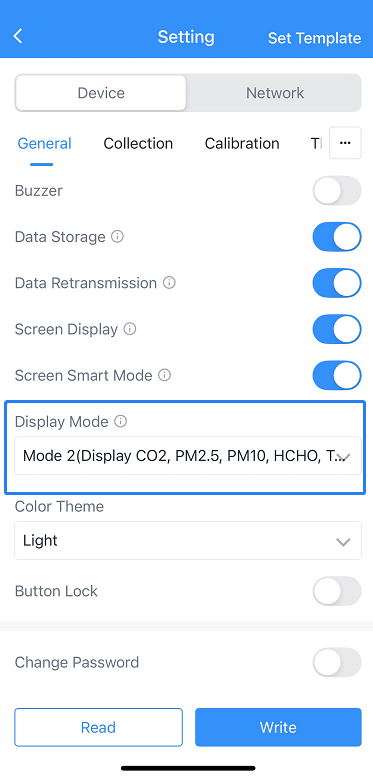
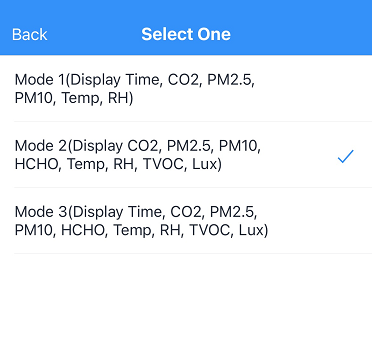
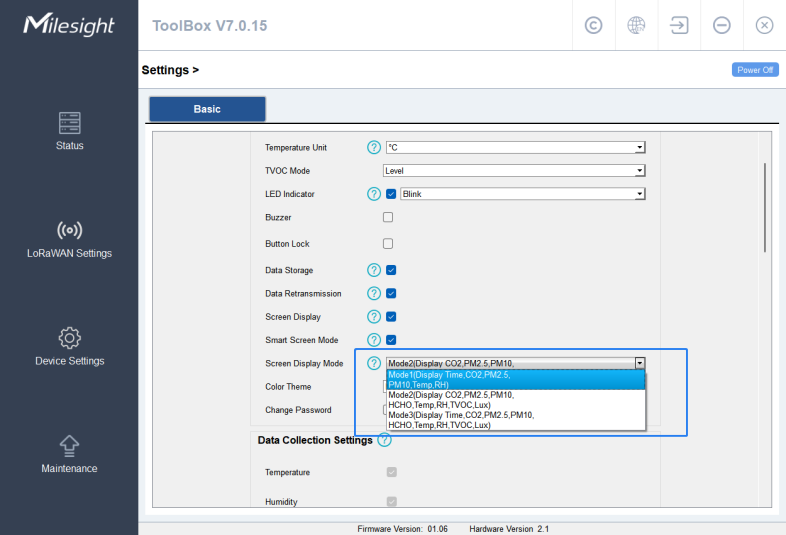
- Software: Go to Toolbox menu Device Settings -> Basic -> Basic Settings->Screen Display Mode to select screen display mode, and click Save.
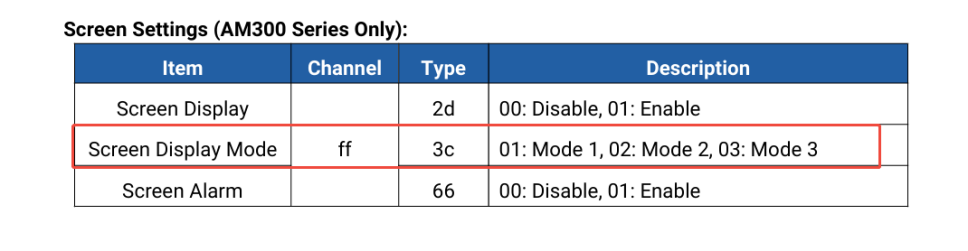
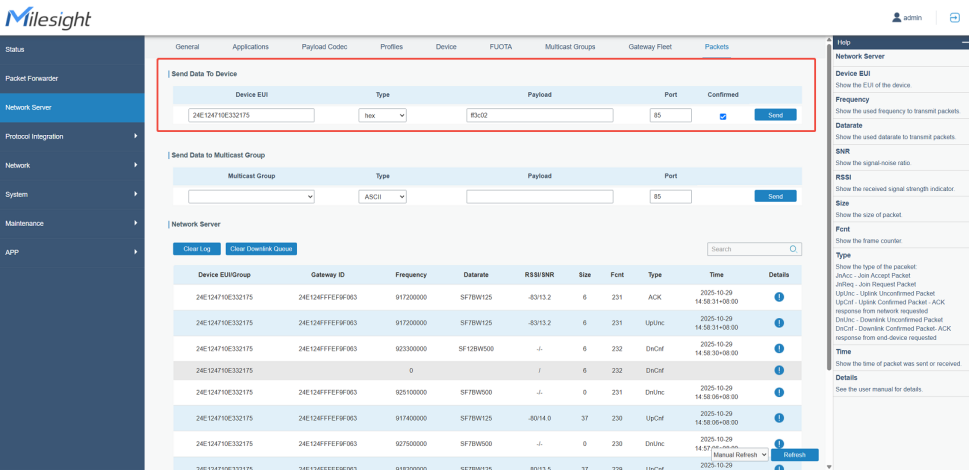
- Downlink command: Downlink commands can be sent to the AM300 series via NS to control the display mode. Here, the embedded NS of the gateway is used as an example. Network Server->Packets->Send Data To Device, sending the corresponding downlink command.
--END--
Was this article helpful?
That’s Great!
Thank you for your feedback
Sorry! We couldn't be helpful
Thank you for your feedback
Feedback sent
We appreciate your effort and will try to fix the article